Create a Customer Feedback App Without Coding: A Simple Guide Using AI Assistance
Ever wanted to collect and review customer feedback but felt overwhelmed by technical jargon and complex setups? What if you could build a fully functional and visually appealing feedback app—with the ability to view submitted feedback—all within a single file and with zero coding experience?
In this guide, we'll walk you through creating a complete customer feedback app using AI assistance, including a way to view the collected feedback as an administrator. No prior coding knowledge required!
Why Build a Feedback Form Using AI Assistance?
Simplicity and Practicality
-
Chosen for Simplicity: We've chosen to build a feedback form because it's simple yet highly practical. This project doesn't require extensive technical knowledge or time commitment, making it perfect for beginners.
-
Avoiding Complexity: By focusing on a straightforward application, we keep things manageable and accessible for everyone. Tackling more complex topics could turn this guide into a book rather than a single post.
Empowering Problem-Solving
-
Learning Core Concepts: This example showcases the basic principles of using AI assistance to create functional applications. These principles can be applied to more complex projects in the future.
-
Quick and Effective Results: You can accomplish this project in just one or two hours at home after work. There's no need to invest a lot of time to get valuable results.
-
Automate and Streamline: Understanding these fundamentals empowers you to start automating tasks or streamlining processes in your life, work, or business, making things easier and more efficient.
Understanding the Basics of Web App Creation
What Is a Web Application?
A web application is a program you use over the internet through your web browser, such as online forms, shopping carts, and email platforms.
Languages Used in Web Development
-
Python: User-friendly and great for beginners.
- Known for its simplicity and readability, making it a popular choice for new developers and experienced programmers alike.
-
JavaScript: Versatile, runs in browsers and servers.
- Powers the interactive parts of most websites and is used both on the client and server sides.
Popular Tools for Building Web Apps
-
Flask (Python):
- A simple tool for creating web applications with Python, ideal for small projects and beginners.
-
Node.js (JavaScript):
- Allows JavaScript to be used on the server side, enabling scalable network applications.
Our Choice: Python with Flask
We'll use Python with Flask because it's straightforward and beginner-friendly. Even without coding experience, you can create a functional web app with AI assistance.
Understanding AI Prompting
Why Simple and Detailed Prompts Matter
Clear and detailed instructions help the AI provide exactly what you need, including both functionality and visual appearance. The more specific you are, the closer the AI's output will match your vision.
Tips for Constructing Effective Prompts
-
Use Everyday Language:
- Explain what you want as if talking to a friend. There's no need for technical jargon.
-
Be Specific About Functionality and Visuals:
- Clearly state what you want the app to do and how you want it to look, including any specific features or design elements.
-
Include Requirements for Both User Interface and Admin Interface:
- Specify that you need a way to view the collected feedback, and describe how you want this admin page to function and appear.
Gathering Functional Requirements
Let's list all the features and functionalities we want our application to have. This step ensures that the AI can generate the app according to our needs.
Functional Requirements of the Application
-
Feedback Form Page
-
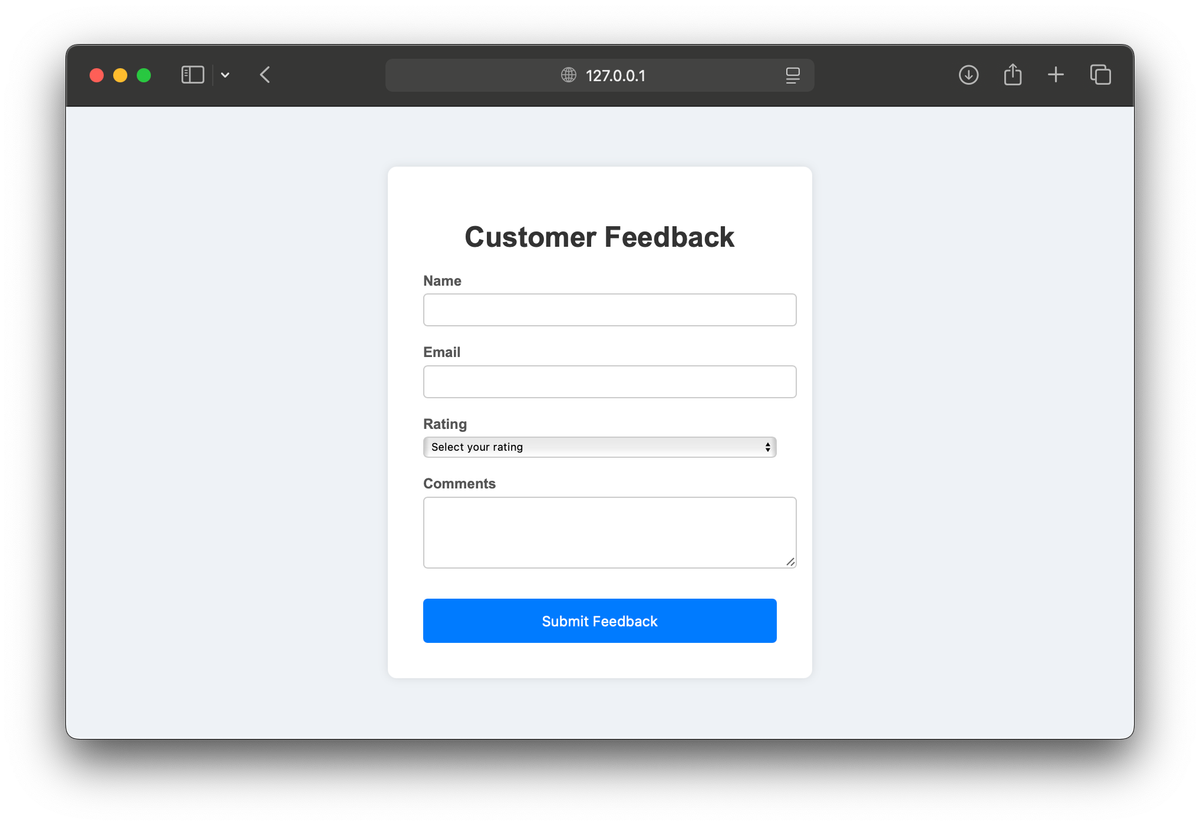
Display a web page with a form that includes the following fields:
- Name (text input)
- Email (email input)
- Rating (dropdown selection from 1 to 5 stars)
- Comments (text area)
-
The form should have a clean and modern look, with a blue color scheme and centered on the page.
-
-
Data Handling
-
When a user submits the form, the app should:
- Save the feedback data to a file named
feedback.txton the server. - Include the user's name, email, rating, and comments in the saved data.
- Save the feedback data to a file named
-
-
Thank-You Page
- After submission, display a thank-you message to the user confirming that their feedback has been received.
-
Admin Feedback View
-
Provide an admin page accessible at the
/adminURL.- Displays all submitted feedback in a readable format.
- Presents the feedback in a clean and organized manner, possibly in a table or list.
- Has the same visual style as the feedback form for consistency.
-
-
Single-File Application
-
All the code, including the Python logic, HTML templates, and CSS styling, should be contained within a single file named
app.py. -
This simplifies deployment and makes it easier for non-technical users to manage the application.
-
Constructing the Prompt Based on the Requirements
Now that we have our functional requirements, we can construct an effective prompt to the AI assistant.
Sample Prompt Incorporating All Requirements
Hi AI, can you help me create a simple customer feedback web application using Python Flask? I want everything in a single file named "app.py". The app should:
1. Show a web page with a form that has fields for:
   - Name
   - Email
   - Rating (1-5 stars)
   - Comments
   - The form should have a clean and modern look, with a blue color scheme and centered on the page.
2. When someone submits the form, the app should:
   - Save the feedback to a file called "feedback.txt", including the user's name, email, rating, and comments.
3. After submission, the app should:
   - Show a thank-you message confirming that their feedback has been received.
4. Include an admin page accessible at "/admin" that:
   - Displays all submitted feedback in a readable format.
   - Presents the feedback in a clean and organized manner.
   - Has the same visual style as the feedback form for consistency.
5. Please include all the necessary code in the single "app.py" file, including any HTML and styling code needed.
Why This Prompt Works
-
Clarity: Clearly states all functionalities, matching our functional requirements.
-
Specificity: Includes details about visual style and admin page presentation.
-
Completeness: Requests all code in a single file for simplicity.
Step-by-Step Guide
Step 1: Setting Up Your Environment
Tools You'll Need
-
AI Assistant: We'll use ChatGPT to generate the code.
-
Python: Download and install it from python.org.
-
Text Editor: Any simple text editor like Notepad (Windows) or TextEdit (Mac).
-
Command Prompt/Terminal: For running your app.
Step 2: Using AI to Generate Your App with Visual Enhancements and Admin View
Copy and Paste the Prompt into ChatGPT
Use the prompt we constructed based on our requirements and paste it into the AI assistant.
AI Response
The AI will generate the complete app.py code, including:
-
The feedback form with the specified fields and visual styling.
-
Data handling to save feedback to
feedback.txt. -
A thank-you message after form submission.
-
An admin page at
/adminthat displays all feedback in a readable format with consistent styling.
from flask import Flask, render_template_string, request, redirect, url_for
import os

app = Flask(__name__)

# HTML template for the feedback form
feedback_form = '''
<!doctype html>
<html lang="en">
<head>
    <title>Customer Feedback</title>
    <style>
        body {
            background-color: #eef2f7;
            font-family: Arial, sans-serif;
            display: flex;
            justify-content: center;
            align-items: center;
            height: 100vh;
            margin: 0;
        }
        .feedback-form {
            background-color: #fff;
            padding: 40px;
            border-radius: 10px;
            box-shadow: 0 0 10px rgba(0,0,0,0.1);
            width: 400px;
        }
        .feedback-form h1 {
            text-align: center;
            color: #333;
        }
        .feedback-form label {
            display: block;
            margin-top: 20px;
            color: #555;
            font-weight: bold;
        }
        .feedback-form input, .feedback-form textarea, .feedback-form select {
            width: 100%;
            padding: 10px;
            margin-top: 5px;
            border: 1px solid #ccc;
            border-radius: 5px;
        }
        .feedback-form button {
            margin-top: 30px;
            width: 100%;
            background-color: #007BFF;
            color: white;
            padding: 15px;
            border: none;
            border-radius: 5px;
            font-size: 16px;
            cursor: pointer;
        }
        .feedback-form button:hover {
            background-color: #0056b3;
        }
    </style>
</head>
<body>
    <form class="feedback-form" method="post" action="/submit">
        <h1>Customer Feedback</h1>
        <label for="name">Name</label>
        <input type="text" id="name" name="name" required>

        <label for="email">Email</label>
        <input type="email" id="email" name="email" required>

        <label for="rating">Rating</label>
        <select id="rating" name="rating" required>
            <option value="" disabled selected>Select your rating</option>
            <option value="1">1 star</option>
            <option value="2">2 stars</option>
            <option value="3">3 stars</option>
            <option value="4">4 stars</option>
            <option value="5">5 stars</option>
        </select>

        <label for="comments">Comments</label>
        <textarea id="comments" name="comments" rows="4" required></textarea>

        <button type="submit">Submit Feedback</button>
    </form>
</body>
</html>
'''

# HTML template for the thank-you page
thank_you_page = '''
<!doctype html>
<html lang="en">
<head>
    <title>Thank You</title>
    <style>
        body {
            background-color: #eef2f7;
            font-family: Arial, sans-serif;
            display: flex;
            justify-content: center;
            align-items: center;
            height: 100vh;
            color: #333;
            margin: 0;
        }
        .thank-you {
            text-align: center;
        }
        .thank-you h1 {
            font-size: 36px;
        }
        .thank-you p {
            font-size: 18px;
        }
        .thank-you a {
            display: inline-block;
            margin-top: 20px;
            text-decoration: none;
            color: #007BFF;
            font-size: 18px;
        }
        .thank-you a:hover {
            color: #0056b3;
        }
    </style>
</head>
<body>
    <div class="thank-you">
        <h1>Thank You!</h1>
        <p>Your feedback has been received.</p>
        <a href="/">Submit Another Feedback</a>
    </div>
</body>
</html>
'''

# HTML template for the admin page
admin_page = '''
<!doctype html>
<html lang="en">
<head>
    <title>Admin - Feedbacks</title>
    <style>
        body {
            background-color: #eef2f7;
            font-family: Arial, sans-serif;
            padding: 40px;
            color: #333;
            margin: 0;
        }
        h1 {
            text-align: center;
        }
        .feedback {
            background-color: #fff;
            padding: 20px;
            margin-bottom: 20px;
            border-radius: 10px;
            box-shadow: 0 0 10px rgba(0,0,0,0.1);
        }
        .feedback h2 {
            margin-top: 0;
        }
        .feedback p {
            margin: 5px 0;
        }
        .feedback strong {
            display: inline-block;
            width: 80px;
        }
    </style>
</head>
<body>
    <h1>All Feedbacks</h1>
    {% if feedbacks %}
        {% for fb in feedbacks %}
        <div class="feedback">
            <h2>{{ fb['name'] }}</h2>
            <p><strong>Email:</strong> {{ fb['email'] }}</p>
            <p><strong>Rating:</strong> {{ fb['rating'] }} stars</p>
            <p><strong>Comments:</strong></p>
            <p>{{ fb['comments'] }}</p>
        </div>
        {% endfor %}
    {% else %}
        <p>No feedbacks submitted yet.</p>
    {% endif %}
</body>
</html>
'''

@app.route('/')
def index():
    return render_template_string(feedback_form)

@app.route('/submit', methods=['POST'])
def submit():
    name = request.form['name']
    email = request.form['email']
    rating = request.form['rating']
    comments = request.form['comments']

    # Save feedback to file
    with open('feedback.txt', 'a') as f:
        f.write(f"Name: {name}\nEmail: {email}\nRating: {rating}\nComments: {comments}\n{'-'*40}\n")

    return render_template_string(thank_you_page)

@app.route('/admin')
def admin():
    feedbacks = []
    if os.path.exists('feedback.txt'):
        with open('feedback.txt', 'r') as f:
            content = f.read()
            entries = content.strip().split('-'*40)
            for entry in entries:
                if entry.strip() == '':
                    continue
                lines = entry.strip().split('\n')
                fb = {}
                for line in lines:
                    key, value = line.split(': ', 1)
                    fb[key.lower()] = value
                feedbacks.append(fb)
    return render_template_string(admin_page, feedbacks=feedbacks)

if __name__ == '__main__':
    app.run(debug=True)
Step 3: Running Your Application
Saving the Code
-
Open your text editor (e.g., Notepad or TextEdit).
-
Paste the code provided by the AI into the text editor.
-
Save the file as
app.pyin a folder of your choice.
Installing Flask
-
Open Command Prompt (Windows) or Terminal (Mac/Linux).
-
Install Flask by typing the following command and pressing Enter:
pip install flask- This command installs Flask, the tool we need to run our web app.
Running the App
-
Navigate to your project folder where you saved
app.pyby typing:cd path_to_your_folder- Replace
path_to_your_folderwith the actual path to your folder.
- Replace
-
Start the app by typing:
python app.py -
See the output, which should look something like:
* Serving Flask app "app" (lazy loading)
* Environment: production
* Debug mode: on
* Running on http://127.0.0.1:5000/ (Press CTRL+C to quit)
Step 4: Testing the Application
Testing the Feedback Form
-
Open your web browser (e.g., Chrome, Firefox).
-
Go to
http://127.0.0.1:5000/. -
Observe the visually enhanced form with a blue color scheme and centered layout.
-
Fill out the feedback form with sample data.
-
Submit the form by clicking the "Submit Feedback" button.
-
See the thank-you message confirming that your feedback was received.
-
Check the
feedback.txtfile in your project folder to see the saved feedback.
Accessing the Admin Feedback View
-
Go to
http://127.0.0.1:5000/adminin your web browser. -
View the submitted feedback displayed in a table format.
-
Verify the consistency of the visual style between the feedback form and the admin page.
What to Do If You Encounter Issues
-
Regenerate the Code: If the app doesn't work as expected, try regenerating the code with the same prompt in the AI assistant.
-
Extend the Prompt: If you want to add features or fix issues, extend your prompt with additional details and regenerate the response.
-
Test After Changes: Always test the application after making changes to ensure everything works properly.
Conclusion
Celebrate Your Achievement
🎉 Congratulations!
You've built a functional and visually appealing customer feedback app with an admin view to monitor submissions—all without writing any code yourself!
-
What You've Achieved:
-
Created a web application using Python and Flask.
-
Designed a modern feedback form with a blue color scheme.
-
Enabled the app to save feedback to a local file.
-
Implemented an admin page to view submitted feedback.
-
Learned how to construct effective prompts to get the best results from AI.
-
What's Next?
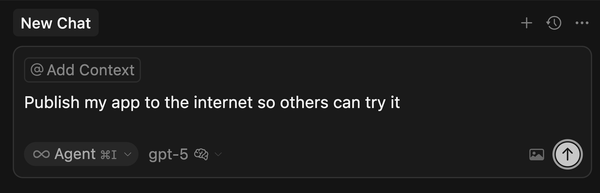
In the next post, we'll show you how to deploy your app online so you can start collecting real feedback from your customers.
Stay tuned for:
-
Deploying Your App Online: We'll guide you through hosting your app so others can access it. Read our post about how to deploy and launch flask application on our hosting platform (you may skip reading to "Packaging Your Flask Application").
-
Sharing Your App: Learn how to share your app's link with customers, friends, or colleagues.
Bonus: Customizing Your App Further
If you're feeling adventurous, try modifying the prompt to the AI to include additional features or different visual styles.
Enhancements You Can Try
-
Adding Security:
- Consider adding password protection to the admin page to ensure only authorized individuals can view the feedback.
-
Changing Visual Styles:
- Customize the color scheme or add your company logo to align with your branding.
-
Implementing Additional Features:
- Include features like search functionality, data export options, or pagination on the admin page.
Join the Conversation
💬 We'd love to hear from you!
-
Questions or Ideas?
- Leave a comment below—we're here to help!
-
Share Your Success:
- Show off your customized apps or share your experiences with others.
Our platform is designed to help both beginners and experienced developers achieve easy and reliable Go hosting. If you have any questions or need further assistance, feel free to contact us at support@justrunmy.app.
If you found this guide helpful, please share it with others who might benefit. Stay tuned for the next part of this exciting series!
Happy coding with AI assistance!